For
those of you who are not familiar with sewing I will explain. I've
been needing a sewing awl for some time now to help me sew in areas that my sewing machine will not work on such as angled areas. (Click here to see what a real sewing awl looks like) Its
a hand held manual sewing tool that does what a sewing machine does all
except you do it with your hands. WELL I decided to make me one and boy
is it a "Michelle's famous rig" for sure and it works just the same.
I know it seems as though I have a lot of time on my hands but as an at home mom, I am always thinking of how I can make things work and I'm always trying to come up with ways to save money. As many of you know, $15 is a lot of money to spend on a sewing awl when you don't have it SO I have created a homemade sewing awl with a pen and sewing machine needles. It worked so well that I thought I would share what I came up with. For me, it works great but USE THIS AT YOUR OWN RISK because if you drop the pen it seems to land with the needle pointing down so to avoid injuring yourself use with caution!
First we need to gather everything we will need:
- Pen with think inner ink refill shell (mine was empty)
- Sewing needles
- Sewing bobbin and thread (Best thread is Nylon, it won't break)
Barrel of pen - Bottom barrel and metal end cap - Bobbin with thread - Sewing needles - Ink refill shell
Tutorial:
Step 1: First, I disassembled the pen. I then took the ink refill out, pulled the piece off of the end where the ink flows through, put a drop of super glue in the bottom hole and pushed the sewing needle in where the ink flowed. I put a few small pieces of foam in the barrel of the pen to keep the needle from moving up and down; the foam will provide cushion so when you screw the metal end cap back on, it will be snug. After that, you can put the pen back together. I took a pair of pliers to squeeze the end of the metal end cap inward to keep the needle from rotating.
Second, I bent the metal piece of the pen that's used to hang it on a pocket (the clip). I first bent it out slightly, then I made a small bend in the middle where the bobbin will go (it will look like a 7). Then slide the bobbin on and thread the needle. After that, your pretty much done but you can control how much resistance you want in the bobbin by how far you bend the metal piece in. It's not a real sewing awl but it works just the same. I am very happy with mine and it serves it's purpose. Here is one of my projects that I sewed through thick foam at an angle (something my sewing machine can't do)
This is the bottom This is the side
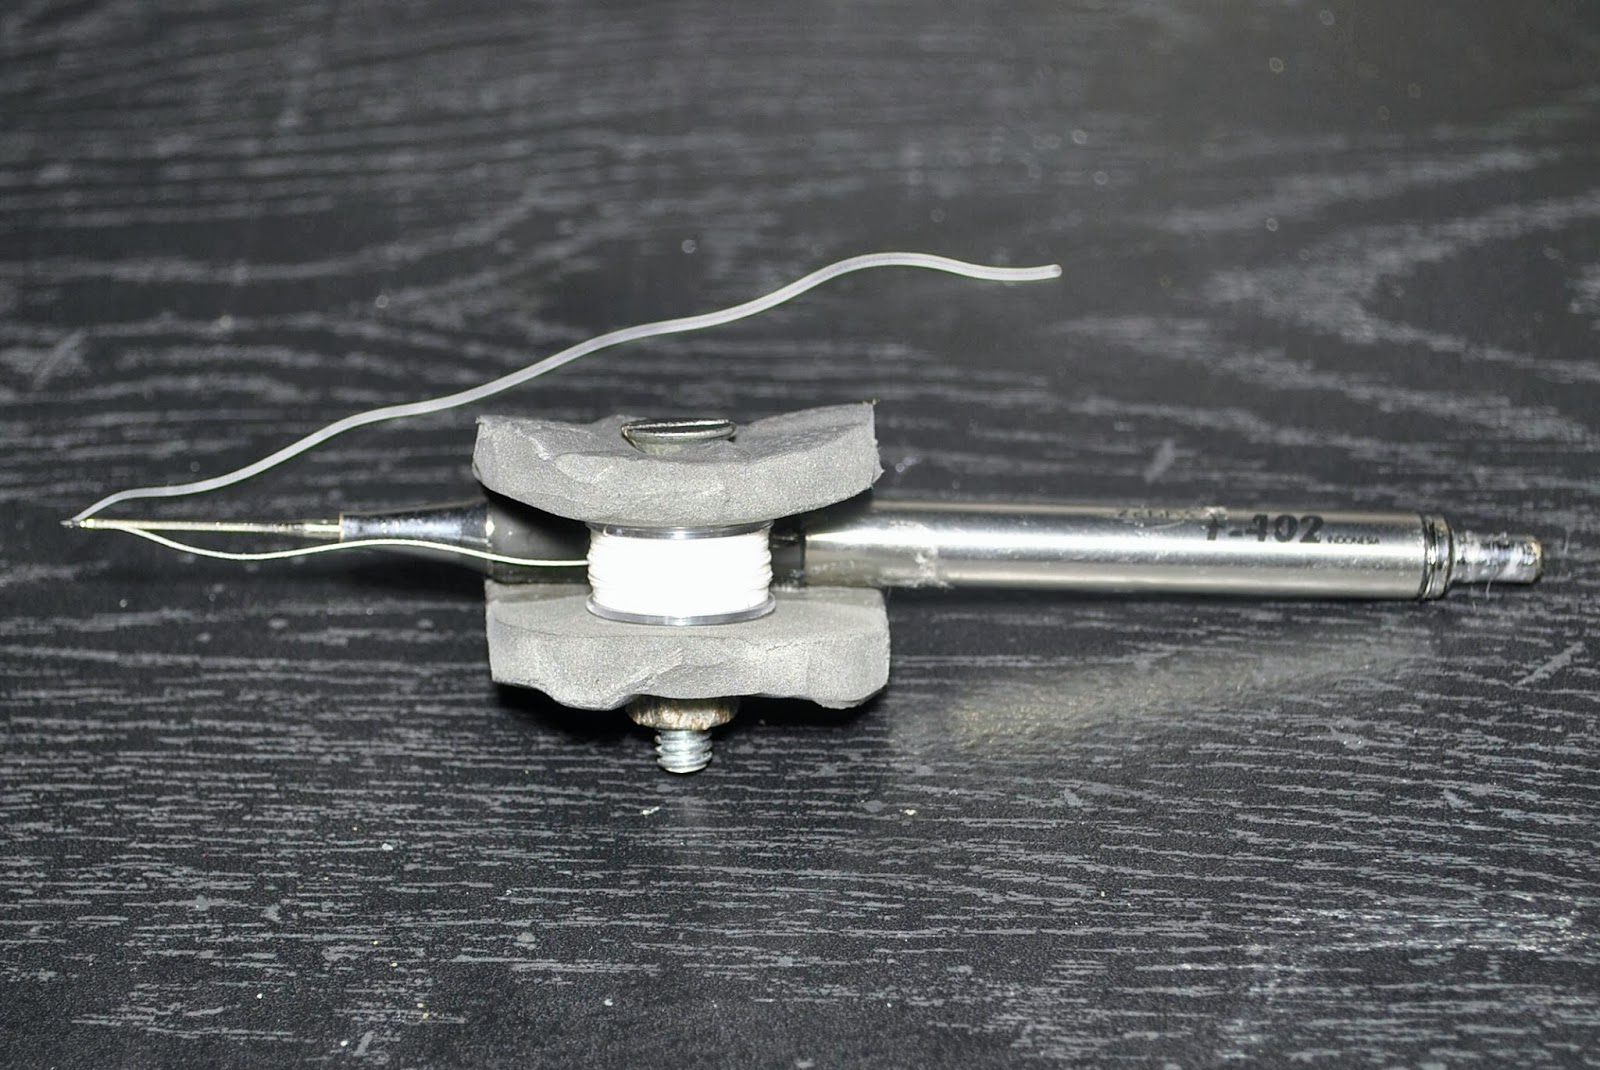
For the second sewing awl, I did a little engineering to try and make it closer to a real sewing awl, unfortunately, I found out that it wasn't as good as I'd hoped. This one didn't work as well as the first one just because the nut and bolt weighed it down and it would turn while I was trying to sew with it so for me, it didn't work well. Here is the second sewing awl:
Here is my catastrophe

Now, to wrap things up I will do a tutorial on how to use the homemade sewing awl you just made. It's very simple and it takes a little getting used to but I love it. It sure beats sewing with a regular needle and thread!
1. Insert the needle and pull the strand of thread through.
2. Next, once you have pulled the thread through, insert the needle all the way and then pull it back to create a loop
3. Next you will take the loose thread and feed it through your loop (Note - make sure that you thread the loop on the opposite side that the thread runs
down to the bobbin or it will catch wrong and you will have to pull the thread strand
out and do the stitch again)

4. Repeat the steps and your stitch should look like this. Once you complete your project, pull the thread thought and tie it off and your done!
Well, I hope you enjoyed my blog on how to make a homemade sewing awl and I hope it can be of some assistance to you. Please let me know if you have any questions by commenting below and feel free to share your projects that you did with your homemade sewing awl!
UPDATE: I added a foam piece to the first sewing awl to help the thread flow smoothly without too much slack. It it really good now! (I took a thick piece of foam and punched a hole in it then slid it up around the pen with the thread under it) The second awl was heavy where the screw was and it was not a good idea so I ended up putting a piece of art wire to hold the bobbin and made it just like the other one.
K Design & Art


